How to Program ESP32-CAM
Introduction
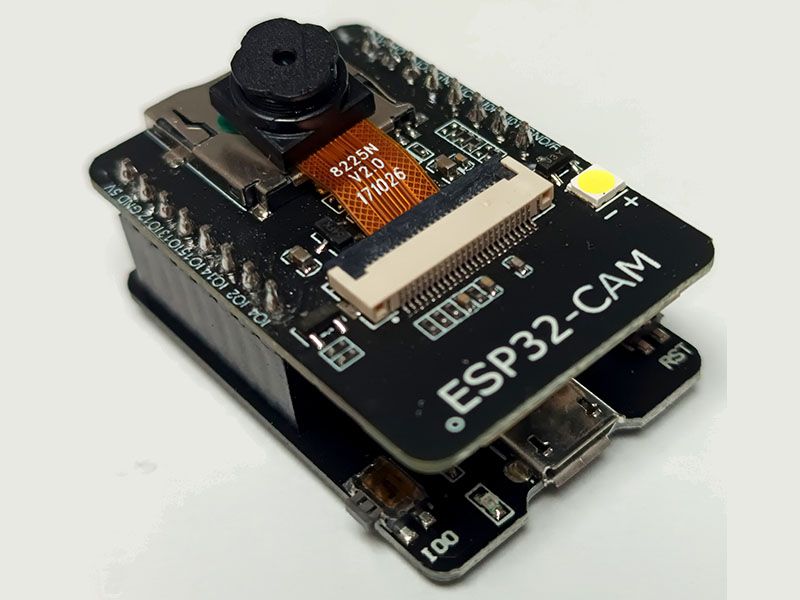
The ESP32-CAM is a versatile and affordable module that combines an ESP32 microcontroller with a camera, making it ideal for IoT projects like video streaming, surveillance, and face recognition. However, programming the ESP32-CAM can be challenging because it lacks a built-in USB port. In this guide, I’ll show you two methods to program the ESP32-CAM:
- Using an Arduino Uno as a programmer.
- Using an FTDI programmer or USB-to-TTL converter.
What You’ll Need
For Both Methods
- ESP32-CAM module
- Jumper wires
- Breadboard (optional)
- Arduino IDE (installed on your computer)
For Arduino Uno Method
- Arduino Uno
- USB cable (for connecting the Arduino Uno to your computer)
For FTDI Programmer Method
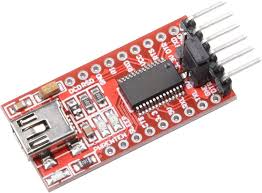
- FTDI programmer or USB-to-TTL converter
- Micro-USB cable (for connecting the FTDI programmer to your computer)
Method 1: Programming ESP32-CAM Using Arduino Uno
Follow these steps to program the ESP32-CAM using an Arduino Uno.
Step 1: Install the ESP32 Board Package in Arduino IDE
To program the ESP32-CAM, you need to install the ESP32 board package in the Arduino IDE. Follow these steps:
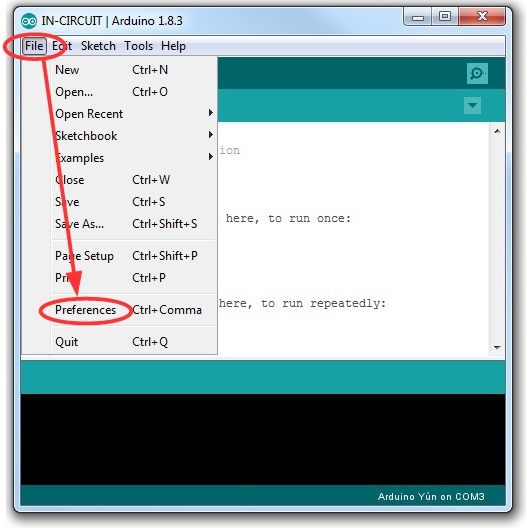
Step 1.1: Open Preferences
Go to File > Preferences in the Arduino IDE. You’ll see the following window:
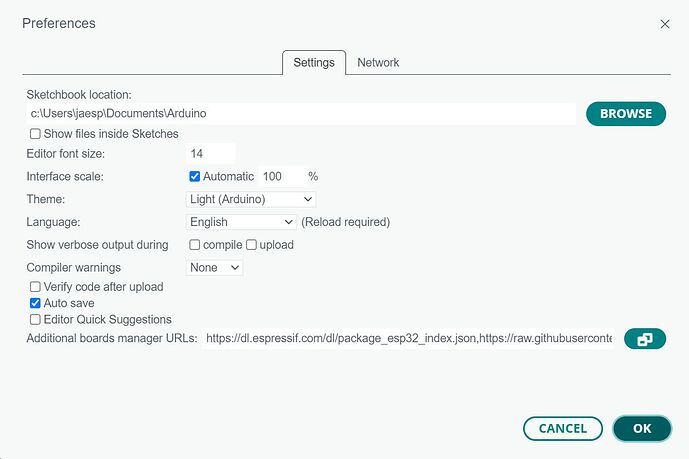
Step 1.2: Add the ESP32 Board Manager URL
In the Additional Boards Manager URLs field, paste the following URL:
https://raw.githubusercontent.com/espressif/arduino-esp32/gh-pages/package_esp32_index.jsonClick OK to save.
Step 1.3: Install the ESP32 Package
Go to Tools > Board > Boards Manager. Search for esp32 and install the ESP32 by Espressif Systems package.

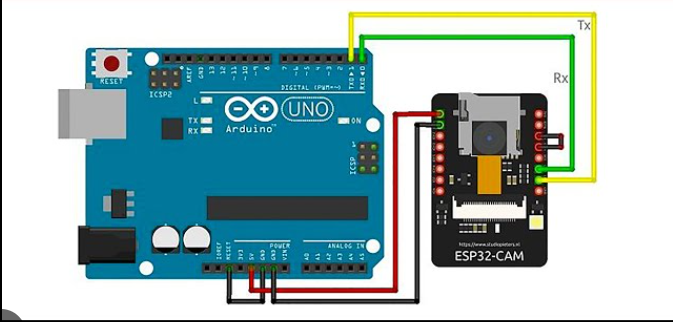
Step 2: Wiring the Arduino Uno to the ESP32-CAM
Connect the Arduino Uno to the ESP32-CAM as shown below.
Step 3: Upload the Code
Upload the code to the ESP32-CAM using the Arduino IDE.
        // Example code for ESP32-CAM
        void setup() {
          Serial.begin(115200);
        }
        void loop() {
          Serial.println("Hello, ESP32-CAM!");
        }
Method 2: Programming ESP32-CAM Using FTDI Programmer
Follow these steps to program the ESP32-CAM using an FTDI programmer.
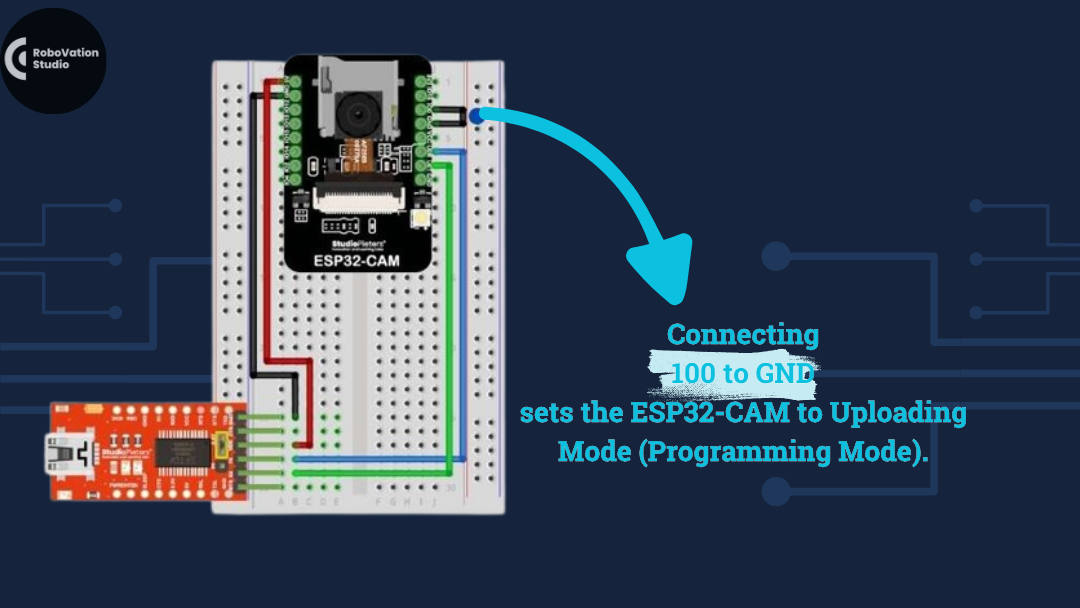
Step 1: Wiring the FTDI Programmer to the ESP32-CAM
Connect the FTDI programmer to the ESP32-CAM as shown below.
Step 2: Upload the Code
Upload the code to the ESP32-CAM using the Arduino IDE.
Conclusion
Programming the ESP32-CAM is easy once you know the right steps. Whether you’re using an Arduino Uno or an FTDI programmer, this guide will help you get started with your ESP32-CAM projects. Don’t forget to check out my website and YouTube channel for more tutorials and project ideas!
Latest Videos
2025 Master OLED Displays with These 4 Essential Arduino Projects!🚀
Discover 4 incredible projects you can create with an OLED display and Arduino! From displaying text to building games and practical tools, this video covers it all. Perfect for beginners and hobbyists looking to expand their skills with OLED.